TUTORIAL: COFFEE COZY
So how is everyone's week going so far? I have been pretty busy this week. I am trying to get things finished up for the upcoming spring show we have in two weeks. I am about done with everything. I have a few more tote bags to finish and then I should be good to go. Then I can get back on the items I need to finish for the summer markets. :)
Last week I showed you the coffee cozies that I am making for the shows and I told you I would show you how to make them. So here we go on making these cute little things.
The first thing I did was get a coffee sleeve from Starbuck's to have a template. Well actually my son did as I don't drink coffee. Making these cozies was actually his idea, so if they don't sell I told him he was going to get them for Christmas! Between him and my daughter (who doesn't drink coffee either) I should be able to get rid of them. OK...back to the instructions :)
When you make the template be sure to measure an additional 1/4 inch to it for the seam line. After you make a template from the sleeve, you cut out the fabric for the front and back of the cozy using the template. I have embroidered Alaska on mine since I am using this for my summer customers that are mostly tourists, but you can use any fabric you like. These work great to clean out your "stash". :)
Next you need to put the padding in the inside. Now I use fusible fleece because I just like it better. You can use any kind of batting or interfacing you like.
After you finish the batting you need to sew the two parts together leaving an opening for turning the cozy inside out.
After you have sewn the two sides together and clipped the curves you turn the cozy inside out. Now I cut the fabric next to the seam line a little bit so it isn't so bulky. Once you have turned the cozy inside out you need to top stitch it.
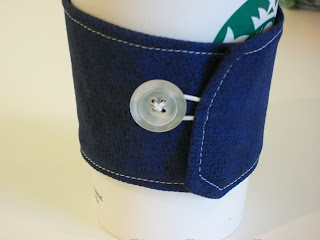
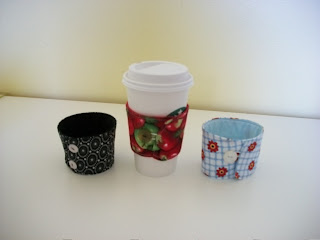
You can close the cozy several different ways. Some sew it closed or use Velcro, but I use buttons. I have a stash of vintage buttons I use to add a little something to them.
You can use a large button attached to the cozy, which if you do be sure to add the elastic to the cozy before you sew the two sides together.
Or you can attach two buttons to the sides to close the cozy. I just sew the button to close it and do not put button holes in.
Whalla....................you have a coffee cozy, but the most important part still needs to be done. CLEAN UP YOUR MESS!!
So now you have a coffee cozy. Hope you liked my tutorial and hope I didn't bore you too bad. :) They actually are really easy once you have done it. They are kind of fun to make. I think they will make really nice small gifts like for teachers, stocking stuffers...you know....those kind of gifts.
Well off to finish the tote bags! Check out the new recipe I have for you too. You can make it for your Easter dinner. I make something similar to this...we call it "company potatoes" because we only make it when we have company. :) Thanks for coming and enjoy your week! :)


